Now that you have your free trial key, what should you do with it?
First, you’re going to want to try it out right away. If you’re like the rest of us, when you get something new you want to see how it works. Testing it in your integration to see if it meets your needs is the best approach.
This article walks you through simple steps and tools that will help you get started, so you can be up and testing quickly.
Testing multiple validation services
If you’re interested in testing additional data validation services, you’ll need a unique key for each one. You are welcome to test as many of our services as you’d like and can easily request additional keys directly from the product page or check out our product directory to see what else interests you.
Although it may seem obvious that a key for DOTS Address Detective won’t work with our DOTS Email Validation service, the same is true for versions within a product. For example, you require unique trial keys for DOTS Address Validation – US 3 and DOTS Address Validation – US 2. In this case, it is the difference between the latest and greatest version of address validation and a legacy service with fewer features.
Why do we keep old services around? To ensure our clients are supported and allow them to control when and if they want to upgrade to the latest version.
Step-by-step with your trial key
To get started, you will want to visit our trial keys’ Service Path page, where all of our products and their multiple versions are listed. Select the product that you are working with to see the endpoint specifications page.
For demonstration purposes, we will use Address Validation – US. Each endpoint specification page can be considered a hub, as it has links to other places of interest (like the developer guides) and a section that allows you to do real-time tests. Below is a screenshot of the page for Address Validation – US.
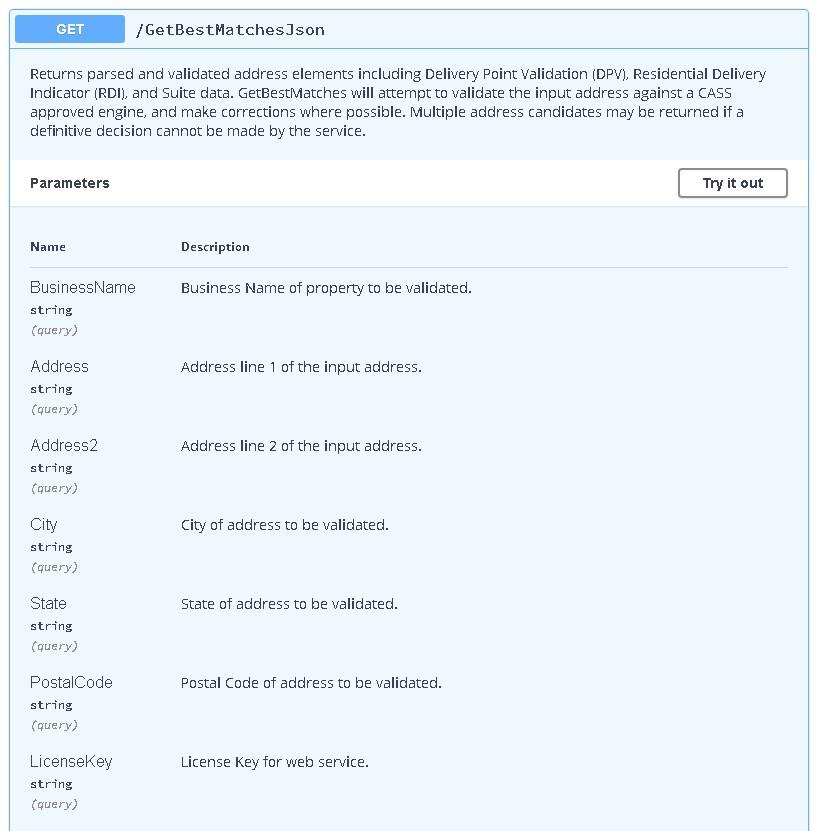
On the right, you will see a list of the available operations. Expanding any of these items will reveal the expected inputs for the selected operation.
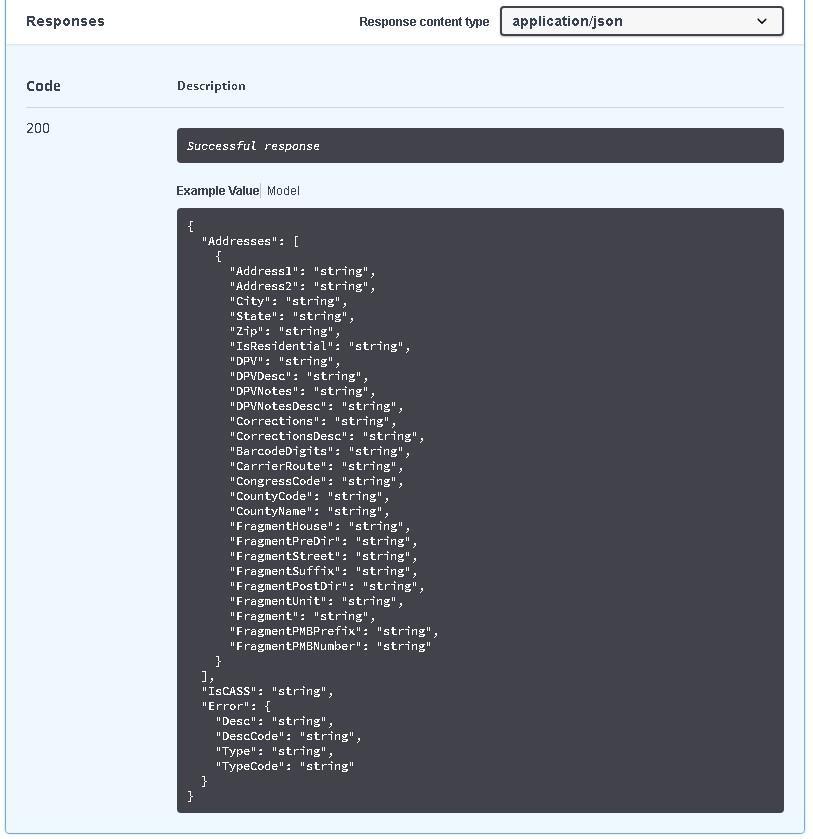
You can see the output format for the response or result shown below the input section.
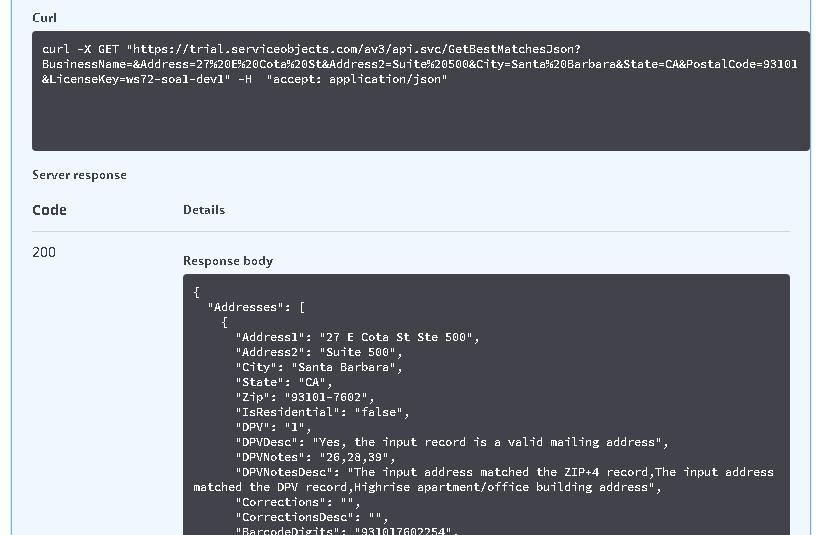
This is a great place to test out the service. If you click the “Try it out” button at the top right of the input section, you can add any address and see the result immediately. If you provide your own data, you can see exactly what the request and response look like with your inputs.
On the left side of the endpoint specifications page, you’ll see two sections:

Sample Inputs has examples of both good and bad addresses that can be clicked on to prepopulate the form for the operation. Try these out to get a good grasp on the difference in the responses.
Other Links has links to the developer guide showcasing the service you have requested, a link to the WSDL for SOAP calls, and links to the REST and SOAP paths.
Moving on to integration
Once you are comfortable with the sample results and how the requests and responses perform, it’s time to move on to a quick integration. Depending on your resources and/or process, there are two typical approaches; creating a testing environment (recommended) or using sample code to test.
1. Create a test environment
We recommend creating a sandbox, copy, or clone of your current environment and dropping our code right in. This may sound a bit heavy this early in the trial process, but the ease of integration makes it quite simple and gives you the strongest sense of how our services work.
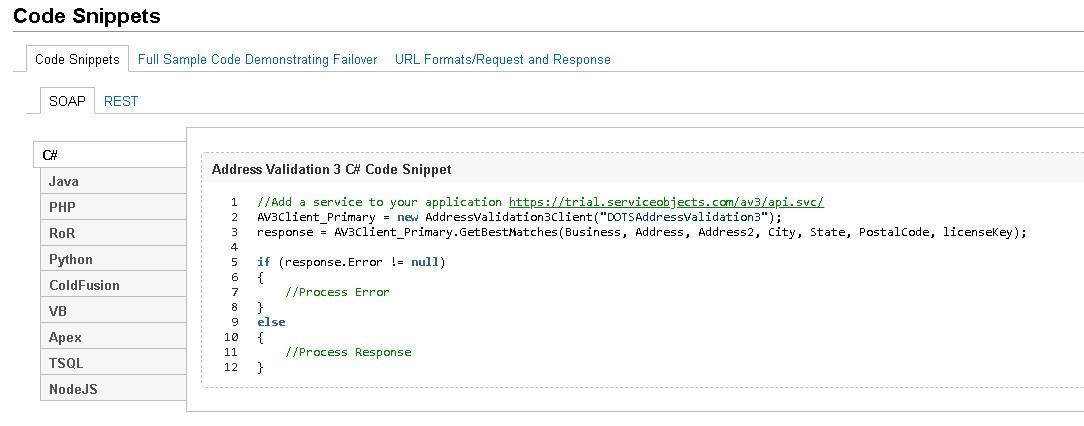
Once you have created your test environment, take a look at your process and code to determine where to add our code to execute the validation service. After you have identified where to implement the code, you can visit our developer guides for a comprehensive guide to getting started, including a list of operations and code snippets for most major programming languages.
In the example below, we are looking at the Address Validation – US developer guide and you can see that we have a variety of code snippets. Select your preferred code snippet, add your trial key and you will be up and running in short order.
2. Use sample code to test
If you do not have the opportunity to integrate directly at this stage, you can download our sample code for a demonstration of a UI form and a validation completed on button click. We find that this sample code is also useful in facilitating integrations (like the one discussed above).
You can find all of our sample code under the developer section of our site’s main navigation and in three easy steps, download the code you need.
Step 1: Select the programming language(s) you are working with.
Step 2: Choose the product(s) you are interested in.
Step 3: Download your sample code from the right-hand column.
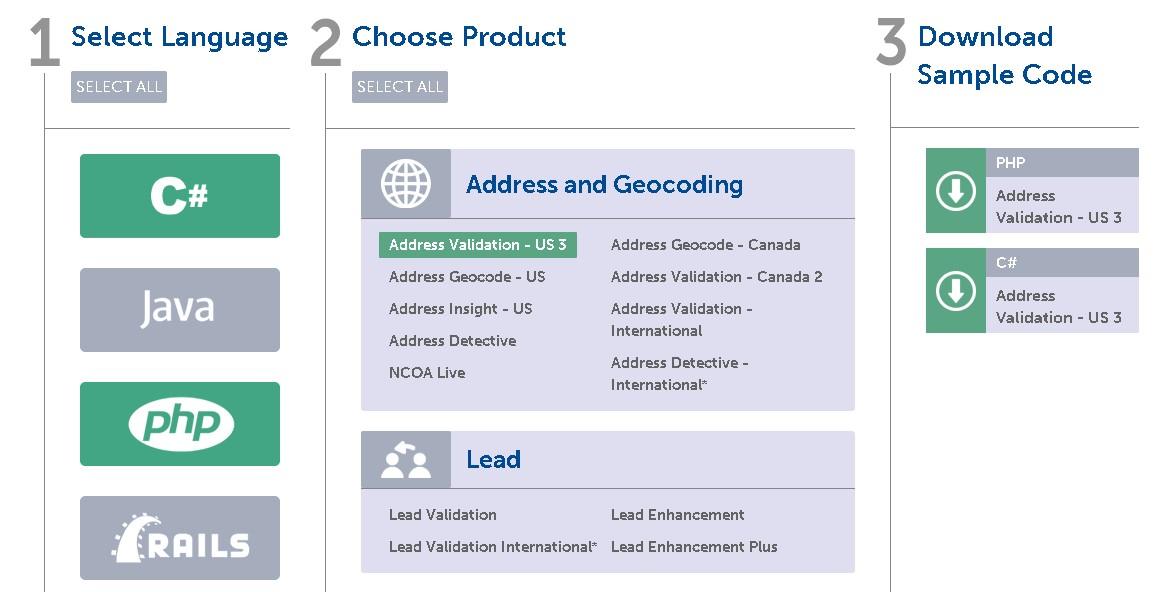
Quick note on sample code: We are always adding new languages and sample code but if you don’t see what you need, let us know and we will be happy to help create it for you.
Testing with sample code
Once you have the code downloaded, open it in your respective integrated development environment (IDE). In this case, I am using the C# sample code, so I am opening it in Visual Studio. You should see something like this list of files when you open the solution:
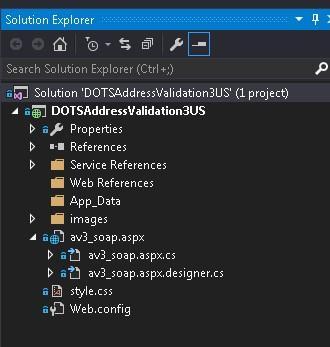
Now, simply run the code and you will have a fully functioning demo. You can also modify it to suit your own needs and add your own design.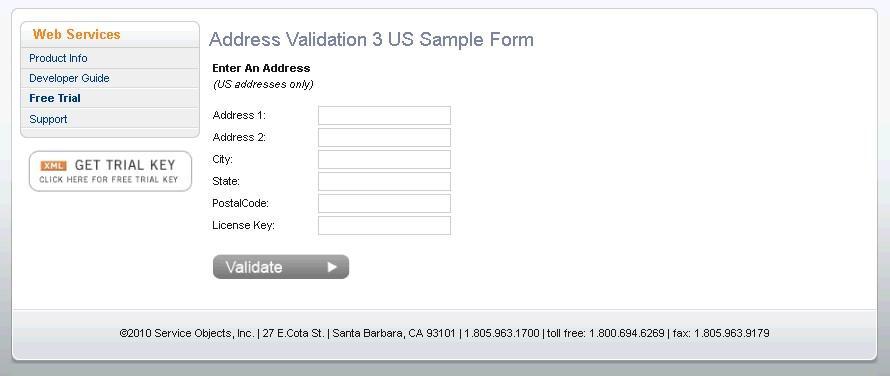
Note: In practice, you won’t want to display the license key as an input. We recommend adding it to the code in the background, in a web config file or something similar.
We are here to help!
This covers the basics of getting started with our services. We are also happy to share our experience with common use cases and provide recommendations on best practices to solve your business needs. However you choose to test and use our services, our knowledgeable application engineers are available to help any time.

