- Products
- Solutions
- Developers
- Support
- About
In our previous blog Data Validation in Power Automate – Part I: Create the Custom Validation Connector, we showed how a connector can be created in Power Automate. In this blog, I am going to show you how to hook this connector up in a flow.
There are countless ways that a connector can be weaved into automated flows. This flow will start with a trigger, and then one or more actions are attached to that trigger. In keeping with the theme of address validation, some of the triggers could be an insert or update to a record in a database, the submission of a form, data entry, or updates in Salesforce or many other third-party platforms. We are focusing on address validation again in this article, but we have seen our lead validation be just as popular when it comes to creating flows.
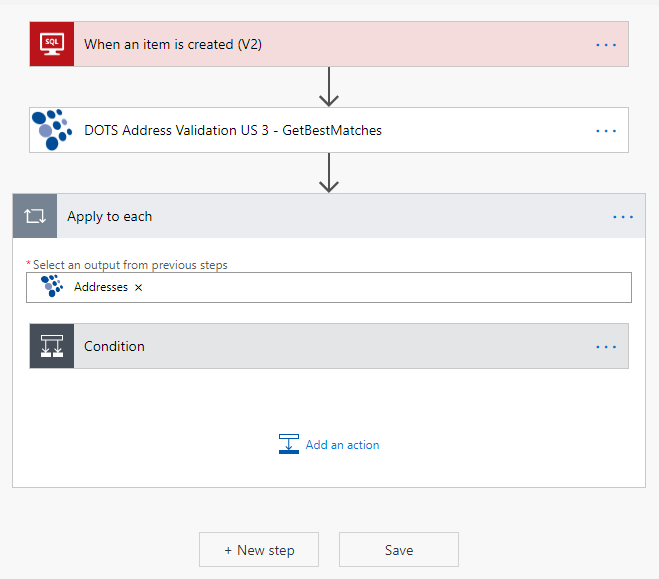
Flows can also be executed on a recurring schedule. This example will have a trigger based on the creation of a record in a SQL database. Here is what the overarching flow looks like.
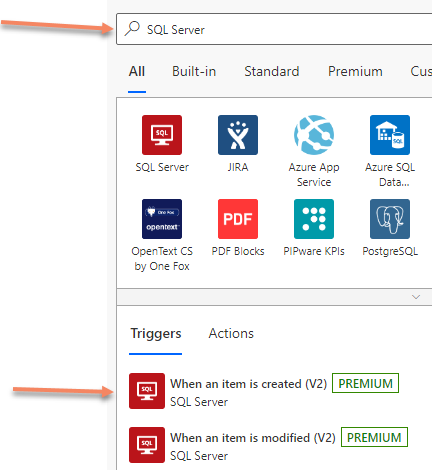
To start, you will want to sign into your Power Automate account and create a new blank automated flow. On the flow designing page, you will be asked to search for and select a trigger. Type in “SQL Server” and a list of available SQL Server connectors will get displayed. Select “When an item is created (V2)”.
To setup the SQL Server connector, you may need to create a gateway on your system to the database. Since I am already set, I can start with the Server name, Database name and Table name right away.
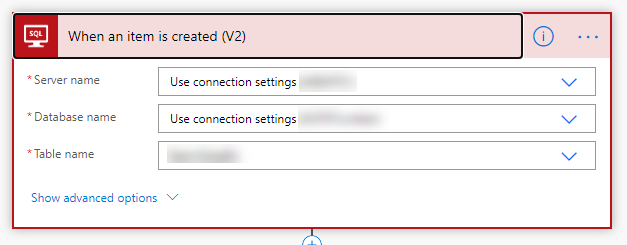
Depending on your business logic, you may want to expand the SQL Server When an item is created (V2) by clicking on Show advanced options in the bottom left of the control. There you can do filtering and adjust the Select Query. This connector will get the record that was created.
Now that we have the record through the SQL trigger, we will want to run the record through the new Service Objects Address Validation US connector that we created in Part 1. We are now ready to add actions.
Click on the New step button under the SQL Server trigger.

That will bring you to the lookup for adding connectors. The one we made will be under the Custom connector tab. Yours will be similar to mine, but I will have a few more Service Objects connectors listed.
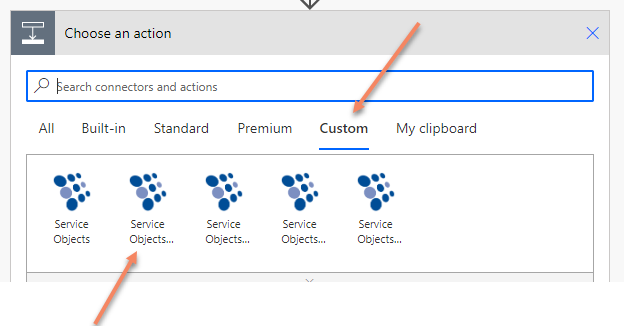
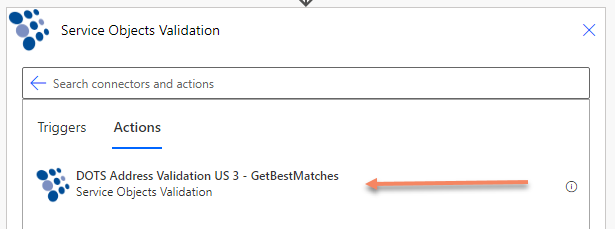
Clicking on the custom connector will take you to the option to select specifically the DOTS Address Validation US 3 – GetBestMatches action – click on that. Of course, this assumes you created the connector based on the instructions in the previous blog.
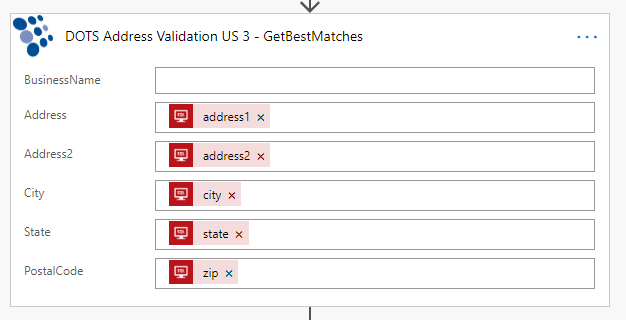
Now we can start setting up the action. In some instances, depending on how you configured the connector in the beginning, you may need to create a name for the connector and add your Service Objects API key first. Then you will be ready to add the mapping, which should look like mine when you are done. I did not have a business name to map in my case, but if you do have that it will only serve to help the validation/correction of the address. Here you can find a definition of the inputs for the service.
After you have completed the mapping, you are ready to move onto the next step of processing the results from the address validation connector. To keep things simple, we are going to just update the database record that got created with the values returned from the connector. Other logic would be appropriate here as well. For instance, instead of just doing an update, you could evaluate some of the results and route a record to another process, or flag records with certain combinations of results like a valid that is both good and residential.
Perhaps, after evaluating the result from the validation, you can add a connector to directly email specific salespeople to act on the record, or send the record to a team for further valuation and/or follow up. There are countless routes the logic can take now that you have the validation completed, and you have a rich data set behind the validation that gets returned with our results. Again, in this case I am keeping it simple and merely updating the record in the database.
So back to processing the record after validation. The first thing to recognize about the results we return to you, specifically for the address validation service, is that there is a potential for multiple addresses to be returned with a single validation. The reason is if the input address does not have a directional on the street, and the address is valid for both an east and west address on that street, then we will return both records. In that situation there is no way for the service to select just one of the addresses when both are equally valid. This doesn’t happen often in practice, but it is really good to understand that so that we can set up the connector flow properly.
With that in mind, the next step is to set up a loop – or in the case of Power Automate, an Apply – to each action where you will want to loop through the addresses as shown next.

Inside the loop I add a condition action where I evaluate the number of addresses returned in from the address validation service. If there is one address only, as the case will usually be, I have the flow take the path of updating the record in the database, otherwise it does nothing. When multiple addresses are returned, the flow does nothing as just mentioned, but here is an opportunity to add additional business logic based on your needs.
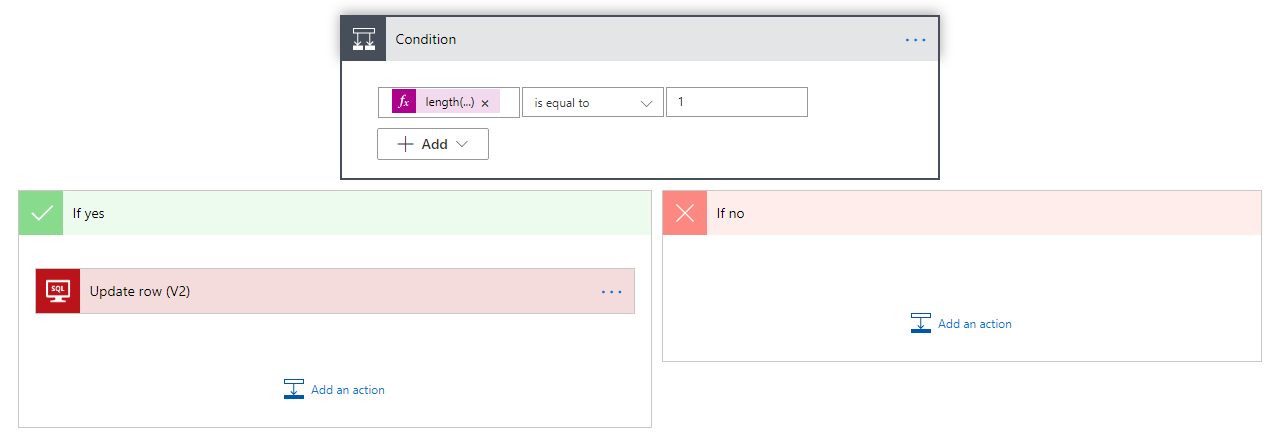
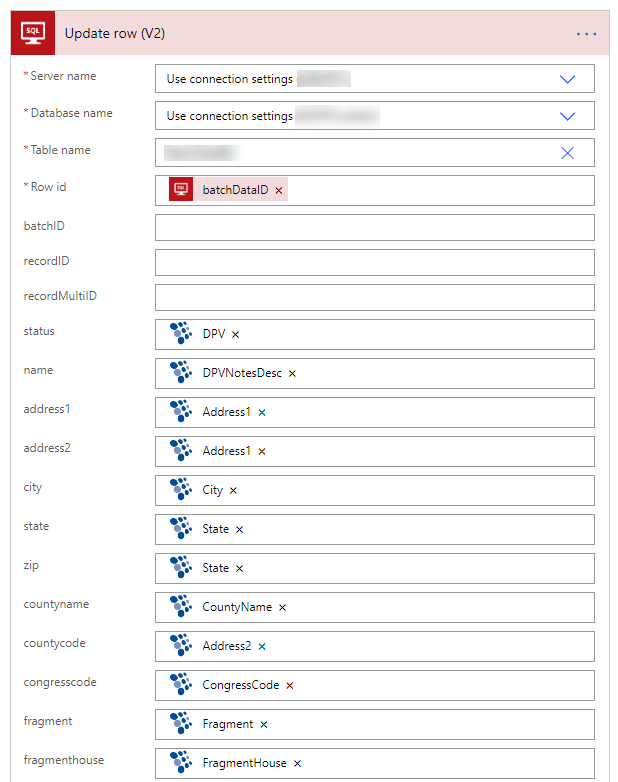
The last bit is to add the SQL action that updates the row using the Update row (V2) connector and map the address validation results to the fields available in the target database table. In my screen shot below, I map just a few of the fields so you can have an idea of what that looks like.
Now, you can run and test your Power Automate Flow. But this is just a start! The address validation connector can be hooked up to many other connector actions and triggers, and with many steps in between and many steps after, all depending on your business logic. At this point, Power Automate has nearly 400 other connectors that can be used to build out your flow. You can create flow templates to streamline making new flows as well. In closing, I hope this has helped you see how easy it is to add address validation to a Power Automate Flow.
Besides the connector we made for Address Validation US, we have many others that you can build out like email validation, phone validation, address geocoding (both domestic and international), lead validation (both domestic and international), IP validation, name validation, and the list goes on. Please see our product page to see a full list of the products we offer. You can even run multiple services and operations together or through out a flow. Our GetSecondaryNumbers in the Address Validation US operation is of particular use when using the validation operation.
Our developer guide can help with some additional details about these products. If you would like to discuss best practices with us regarding integration with Power Automate, feel free to reach out to us and we’ll be happy to talk through the best options based on your goals.


© 2025 Service Objects, Inc. All rights reserved.