- Products
- Solutions
- Developers
- Support
- About
Mulesoft is a widely popular API management platform that helps enterprise businesses easily manage which business processes have access to different APIs within the business. Mulesoft also allows developers to quickly and easily connect APIs and applications together to exchange data. It also allows users to build flows or connectors that can connect many different processes.
It’s no wonder that Service Objects data validation APIs are a great way to get data validated inside of Mulesoft applications. Being the integration experts that we are, we wanted to provide a quick tutorial on how to get a Service Objects API up and running in your Mulesoft environment.
To follow along in this example you will need the following:
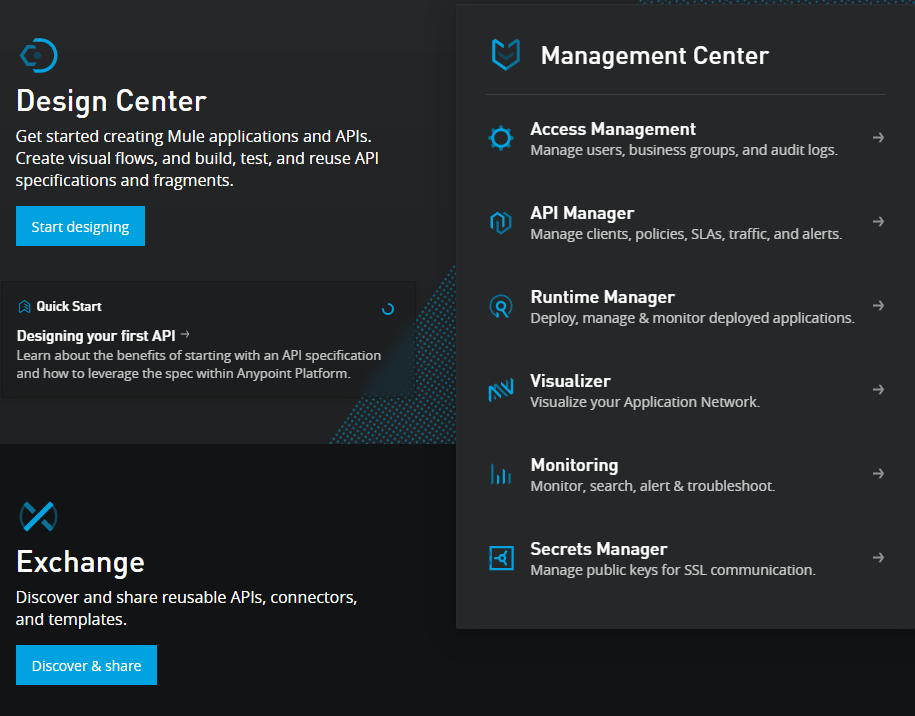
For starters, you will need to log into the Mulesoft Anypoint Platform and head to the Exchange center to add an API connection. Once you are in the Exchange center, you can select “Publish New Asset” in the top right-hand corner. This will lead to a page where you can fill in information about the API you wish to add.
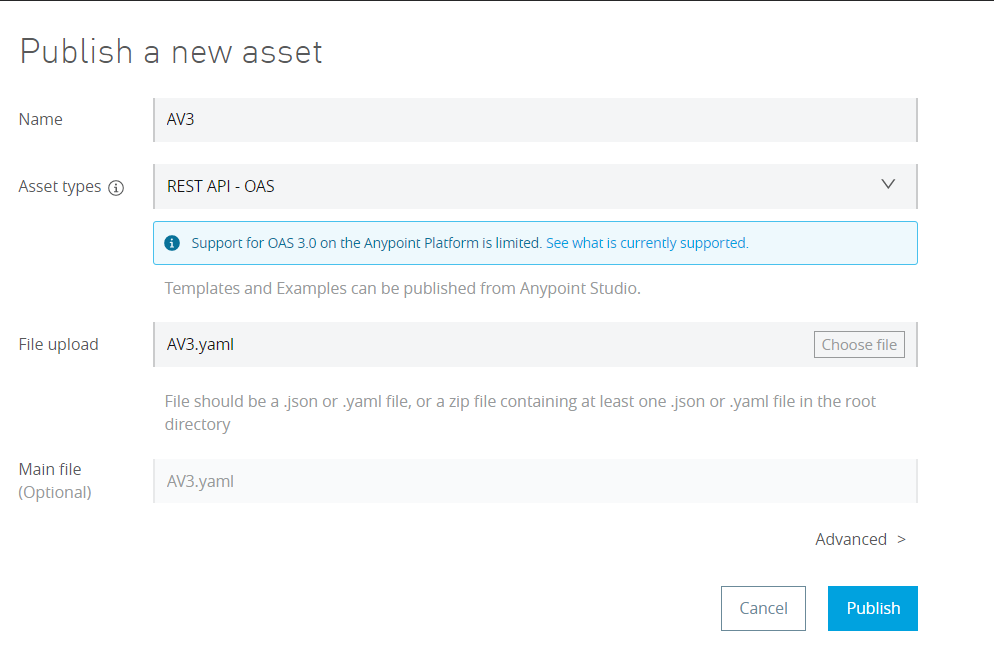
For this example, we’ll be using Open API Specifications/Swagger definitions to tell Mulesoft how the Address Validation – US service is expected to respond. If you are not familiar with Open API or Swagger, we recommend reading up about it. In short, it is a standardized way for developers to describe how an API is expected to operate. We recently added pages to our Developer Guides that utilize these specifications. You can read more about that here.
If you want to get familiar with Service Objects APIs and create your own OAS specification page, go ahead! This would be a great way to get familiar with API and learn all the ins and outs that it expects. Otherwise, you can reach out to us and we’d be happy to provide specifications to quickly and easily upload to Mulesoft. If you are using the OAS specifications to tell Mulesoft how the API is expected to perform, then your setup page should look something like the following:
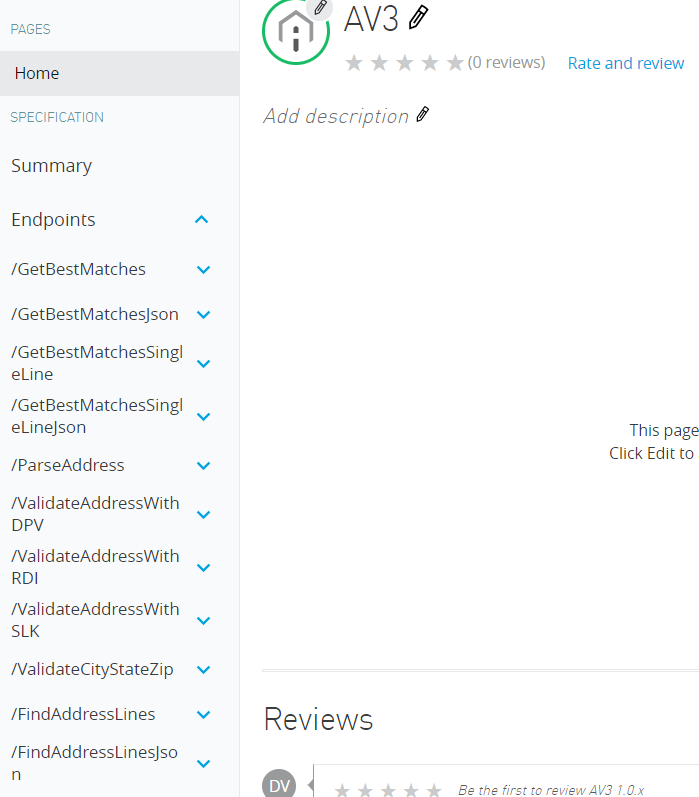
After the asset has been published, you should see the Details page and a sidebar that will highlight all the different operations that the OAS file provided. Our recommended operation for a vast majority of our clients is GetBestMatches for Address Validation – US but there are other operations available; please see the Developer Guide for the service to learn about the others.
Now that our API has been defined, we can create the flow in Anypoint Studio that will make the actual call to the service.
Open up Anypoint Studio (or download it if you haven’t already) and create a project by selecting File, New and Mule Project. From here, you can give your project an appropriate name and import an existing published API from Exchange. Ensure your account is logged in through Anypoint Studio and look for the API you wish to add to the project. Your screen should look something like the following image:
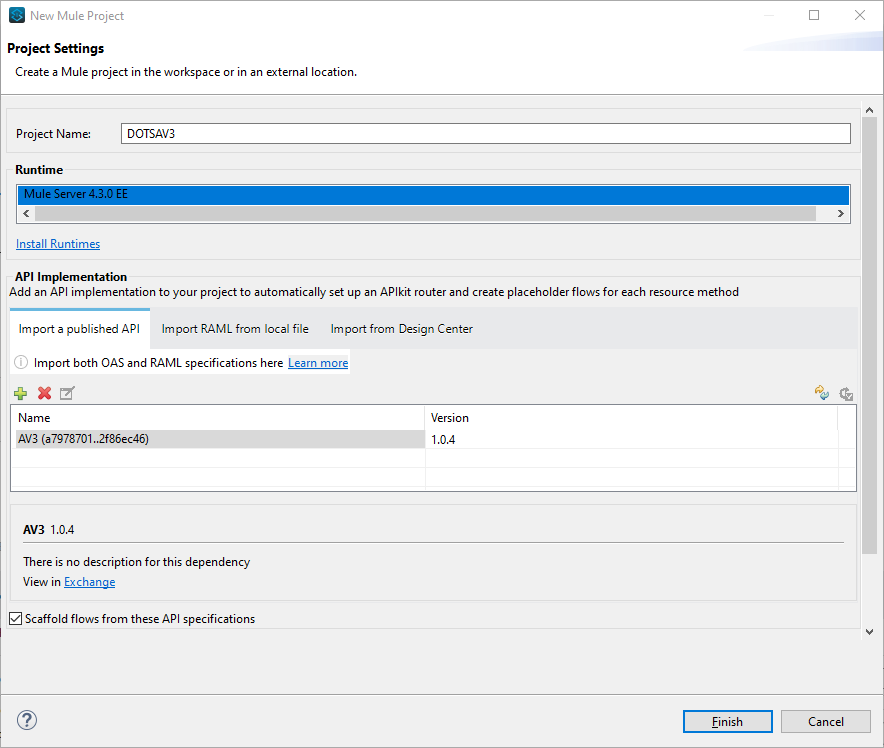
Select Finish to create the project.
From here we can start to create the flow that will call our DOTS AV3 API. To add the AV3 service to the design palette, scroll down the side pane and drag the DOTS Address Validation 3 – US service into the palette.
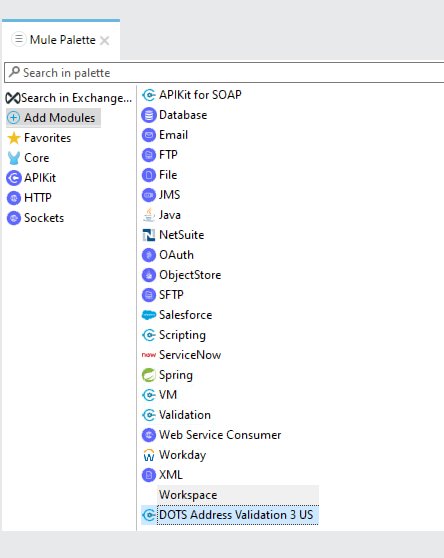
Selecting the DOTS Address Validation 3 US module will allow you to see all the available operations that were defined in the Open API spec page. The ones prefixed with “Create” will be used to call the POST operations and build the respective POST body; the ones prefixed with “Get” call the GET forms of each of the operations. In this example we’ll simply use the one titled “Get get best matches jsons”.
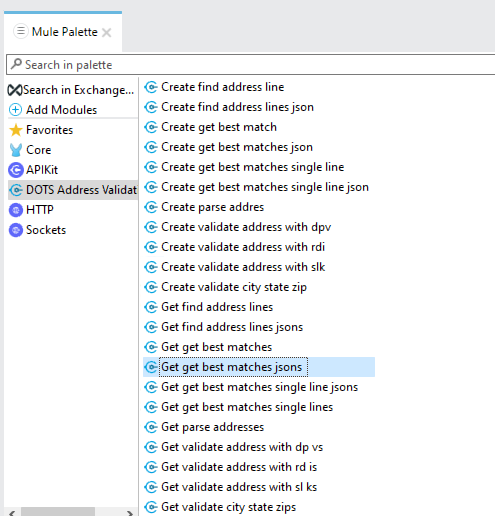
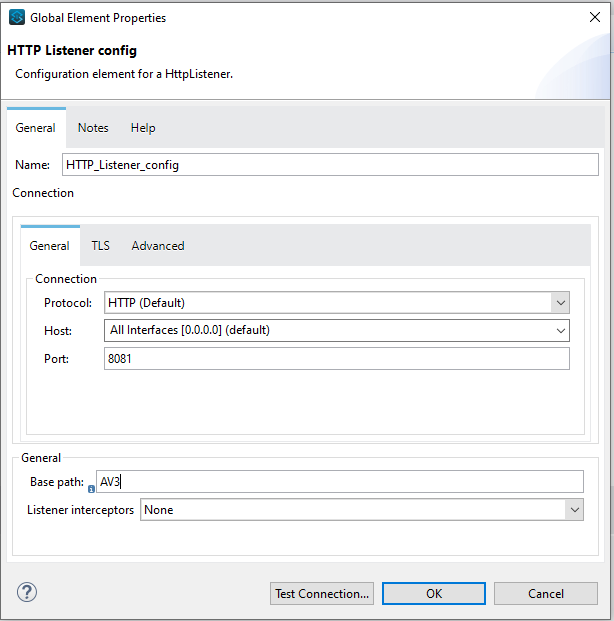
For this specific example, we’re going to demo a call to the service with static inputs; real world uses will likely do something more complicated like pulling records from a CRM or database to be validated. We’ll add an HTTP Listener module and the “Get get best matches jsons” module mentioned in the previous example, as well as a logger module that will allow us to view the response from the API. The HTTP Listener module will allow us to navigate to a localhost link in the browser and call the webservice, and the Logger module will allow us to relay the info back to the page. We’ll add the following configuration settings to the HTTP Listener module:
In the module that calls the DOTS AV3 service, we’ll need to configure some config settings to properly call the service. Your configuration should look something like the following if you are using a trial key:
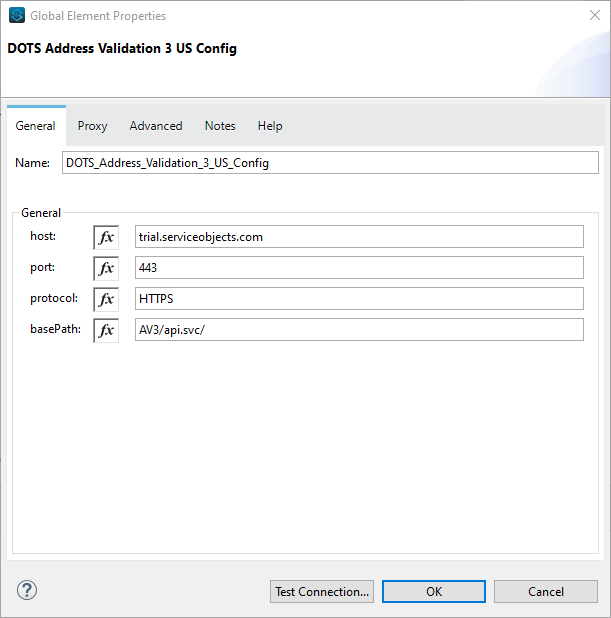
Note: if you are using a production key, replace trial.serviceobjects.com with sws.serviceobjects.com
Now that the config settings are set up, we’ll configure the inputs to the DOTS AV3 service. As noted earlier, we are going to the static inputs as shown below.
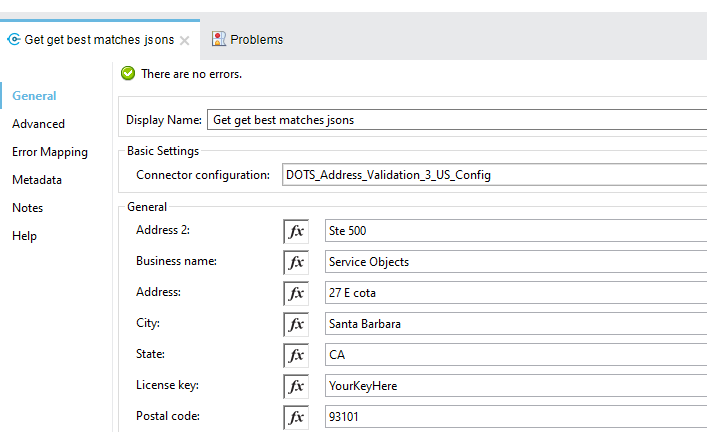
The License Key will likely be the only static field you will want to include here. The function buttons can be used to pull in dynamic values from other modules (i.e. a CRM or database). Now that we have this all setup, we can run the project and see the results from the web service.
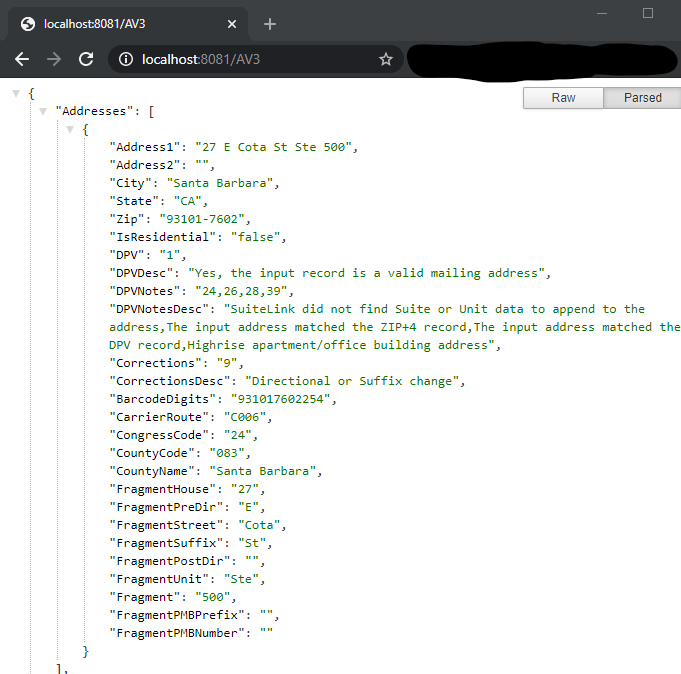
Huzzah! We have some validated data from a Mulesoft flow. From this data can be used to update a database, relay pertinent business information about an address to a specific process, or any other use that you can think of. Each use case is different, so if you have any questions or are looking for recommendations on the best way to integrate a DOTS validation product into your business process, reach out to us and we’ll be glad to make recommendations and help you get the most out of them.


© 2025 Service Objects, Inc. All rights reserved.